 Skip to content
Join with SuperTins, your go-to source for premium custom tins. Elevate your brand with our wholesale options tailored to your industry.
How to Order Custom Tins: From Concept to Production in 6 Steps
Date : June 16, 2026 | Time : 9:42 am
How to order custom tins is one of the most searched questions among brand owners who want packaging that stands out on the shelf. Whether you sell candles, tea, cosmetics, confectionery, or promotional gifts, the right tin can lift your brand's perceived value overnight. This guide walks you through every stage of artwork, mockup, sampling, mass production, quality control, and shipping, so you arrive at the finish line with a product you're proud of.
Getting a custom tin made is not as complicated as it sounds. Follow these six steps, and you'll move from a blank canvas to a finished, shelf ready tin without costly mistakes or wasted time.
According to a 2023 Smithers report on global metal packaging, the tin and metal can market is projected to surpass $130 billion by 2028, driven largely by premium brand packaging demand. Brands that invest in custom tins consistently report higher perceived product value and repeat purchase rates. So if you've been wondering how to order custom tins for your business, now is the best time to start.
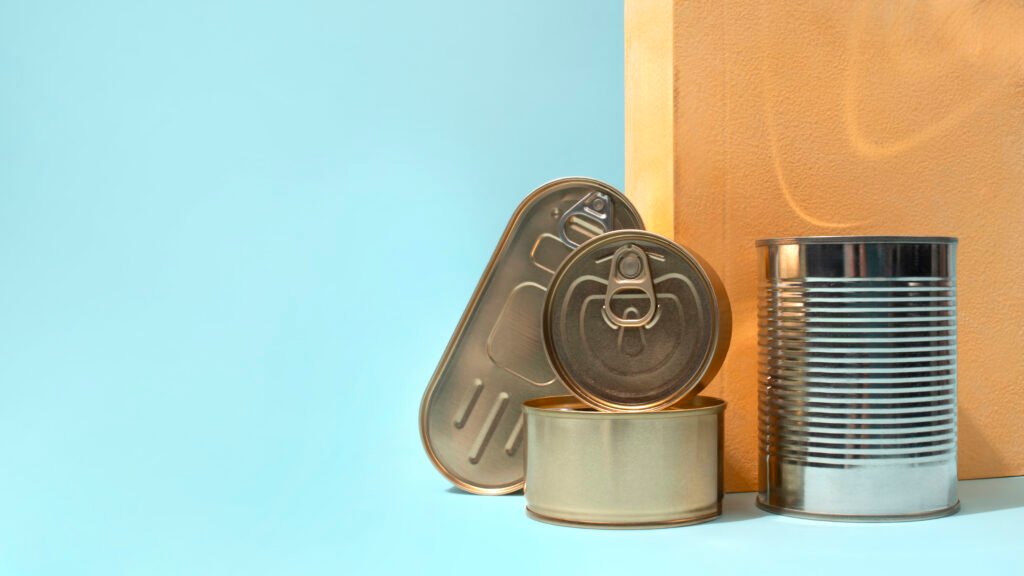
Step 1: Define Your Custom Tin Concept and Requirements
Before you send a single file to a supplier, you need a clear brief. A well defined concept saves you money, shortens the production timeline, and eliminates back and forth that slows everything down. This first step is where most brands either win or lose time. The clearer you are upfront, the smoother every step that follows will be. Think of your brief as the instruction manual your supplier will use to build your tin.
Choose the Right Tin Size and Shape for Your Product
Start with function, then move to form. Ask yourself: What goes inside this tin? How much does it weigh? Does it need a tight seal, a slip lid, or a hinged lid?
| Shape | Best For | Typical Sizes |
|---|---|---|
| Round slip lid | Candles, tea, balms | 50ml – 500ml |
| Rectangular | Confectionery, mints | 80mm x 50mm – 200mm x 120mm |
| Square | Cosmetics, gifts | 70mm x 70mm – 150mm x 150mm |
| Hinged | Jewellery, premium gifts | Custom |
| Oval | Specialty food | Custom |
If you're unsure, check out the full range of custom tin sizes and shapes at SuperTins to see what's available in stock formats before you commit to a fully bespoke tool.
Set Your Minimum Order Quantity (MOQ) Budget Early
Custom tins almost always come with an MOQ, usually between 500 and 5,000 units, depending on the supplier and complexity. Higher quantities bring your cost per unit down dramatically.
| Order Quantity | Est. Cost Per Unit (USD) |
|---|---|
| 500 units | $2.50 – $4.50 |
| 1,000 units | $1.80 – $3.00 |
| 5,000 units | $0.90 – $1.80 |
| 10,000+ units | $0.60 – $1.20 |
Prices vary based on printing complexity, tin gauge, and finish. Always get a formal quote.
Pick Your Finish and Print Style for Custom Tins
The finish defines how your tin looks and feels. Your main options are:
- Offset lithography – Best for photographic quality prints and large runs
- Screen printing – Great for bold, simple designs on smaller runs
- Embossing/debossing – Adds a tactile premium feel
- Matte or gloss varnish – Protects the print and defines shelf appearance
- Spot UV – Highlights key design elements with a glossy layer
Step 2: Prepare Your Artwork Files the Right Way
Getting your artwork right the first time is the single biggest factor in whether your tin looks exactly as you imagined. Submitting incorrect files leads to delays, reprints, and extra costs.
This step matters more than most brand owners realise. Suppliers work with print ready files, not mood boards. So you need to deliver artwork in the right format, at the right resolution, with bleed and safe zones properly set.
Understand the Artwork Template and Dieline
Your supplier will provide a dieline, a flat, unfolded template showing exactly where your tin's panels, lids, and seams fall. You must place your artwork within this dieline. Key zones to know:
| Zone | What It Means |
|---|---|
| Safe zone | Keep all critical text and logos here |
| Bleed area | Extends 3–5mm beyond the cut line |
| Trim line | Where the metal will be cut |
| Seam area | Avoid placing important elements here |
File Format and Resolution Requirements
Always submit files in:
- Format: Adobe Illustrator (.ai) or high-resolution PDF
- Resolution: 300 DPI minimum for raster images
- Colour mode: CMYK, not RGB, which shifts significantly when printed on metal
- Fonts: Outlined or embedded
If your designer works in Canva or Photoshop, make sure they export to CMYK PDF at 300 DPI and outline all fonts before sending.
Common Artwork Mistakes to Avoid When You Order Custom Tins
- Using RGB colour mode instead of CMYK
- Forgetting to bleed artwork gets white edges after trimming
- Placing text too close to seam areas
- Submitting low resolution logo files
- Using fine serif fonts below 8pt, they blur on metal
If you're not confident preparing print ready files, talk to the design team at SuperTins' custom tin ordering service. They can review your artwork before it goes to production.
Step 3: Review Your Digital Mockup and Approve the Proof
Once your artwork is submitted, your supplier will generate a digital mockup showing exactly how your tin will look before a single piece of metal is cut. This is your chance to catch errors, so take it seriously.
Most suppliers use 3D rendering software to produce realistic mockups. Furthermore, some offer physical pre production samples at an extra cost. Both serve the same purpose: making sure you approve the design before it's locked in.
What to Check on Your Digital Proof
Go through this checklist before you approve:
- Brand colours match your brand guidelines (check CMYK values)
- Logo placement is centred and proportional
- No text falls on seam lines
- All text is readable at the actual printed size
- Barcode or QR code is scannable (check with your phone)
- The lid fits correctly (if shown)
How to Request Revisions Without Losing Time
Most suppliers allow two to three rounds of revisions for free. Beyond that, revision fees apply. To keep things moving efficiently:
- Send all revision notes in one consolidated email
- Use numbered annotations on the PDF proof
- Confirm your final approval in writing, an email confirmation works perfectly
When to Request a Physical Pre Production Sample
For orders over 2,000 units or for premium retail packaging, a physical sample is worth the investment. It lets you:
- Check the actual lid fit and tolerances
- Verify colour accuracy under real lighting
- Confirm embossing or debossing depth
- Assess the tin gauge and rigidity
Physical samples typically cost $50–$200 and take 7–14 days to produce and ship. That's money well spent on a large run.
Step 4: Mass Production and Custom Tin Timeline Management
Once you've approved the proof and signed off on the sample, your tin moves into full production. Understanding production timelines helps you plan your launch, avoid stock outs, and manage supplier relationships effectively.
Production timelines vary based on order size, complexity, and factory capacity. As a general rule, budget 25–45 days for mass production after final sign off. Additionally, factor in shipping time on top of that.
Typical Custom Tin Production Timeline
| Stage | Estimated Duration |
|---|---|
| Artwork approval | 3–7 days |
| Pre-production sample | 7–14 days |
| Mass production | 20–35 days |
| Quality inspection | 3–5 days |
| Export packaging & dispatch | 2–3 days |
| Sea freight (Asia to US/EU) | 20–35 days |
| Air freight (Asia to US/EU) | 5–7 days |
Plan backwards from your launch date. If you need tins in your warehouse by October 1, place your order no later than July 15 to allow buffer time.
How to Track Your Production Order
Ask your supplier for:
- A production schedule with milestone dates
- Factory photos or video updates at key stages (metal forming, printing, assembly)
- A dedicated account manager or WhatsApp/WeChat contact
Good suppliers proactively update you. If you don't hear anything for more than a week during production, send a check in. Communication gaps cause the most preventable delays.
Managing Rush Orders for Custom Tins
If you're working against a tight deadline, some factories offer expedited production for a 15–30% premium. Air freight instead of sea freight adds cost but saves 3–5 weeks. Always confirm the fastest possible lead time in writing before committing.
According to the U.S. International Trade Administration, metal packaging imports from key manufacturing countries typically clear customs in 2–5 business days when the commercial invoice, packing list, and tariff codes are prepared correctly.
Step 5: Quality Control Before Your Custom Tins Ship
Quality control (QC) is the step that stands between you and a warehouse full of unusable tins. Never skip it, even with a supplier you've worked with before.
A proper QC inspection catches issues like colour variance, lid fit problems, print misalignment, and surface scratches before the containers are sealed and loaded. This step protects your investment and your brand reputation.
What a QC Inspection Should Cover
| QC Check | What Inspectors Look For |
|---|---|
| Print quality | Colour accuracy, sharpness, bleed |
| Lid fit | Smooth open/close, no excessive force |
| Tin gauge | Wall thickness consistency |
| Surface finish | Scratches, dents, rust spots |
| Dimensions | Actual vs. approved spec |
| Inner coating | Food safe lining (if applicable) |
| Carton integrity | Packaging protects tins in transit |
Hire a Third Party Inspection Service
For large or high value orders, hire an independent inspection company like QIMA, Bureau Veritas, or SGS to conduct a pre shipment inspection at the factory. They charge approximately $250–$400 per inspection day and provide a detailed report with photos.
You can also explore SuperTins' quality assurance process to understand how quality standards are maintained throughout production.
Acceptable Quality Levels (AQL) for Custom Tins
The industry standard for packaging inspection uses AQL (Acceptable Quality Level) sampling tables:
| Defect Type | AQL Standard |
|---|---|
| Critical (safety issue) | 0% - Zero tolerance |
| Major (functional defect) | 1.0 - 2.5% |
| Minor (cosmetic) | 4.0% |
Request that your supplier and any third-party inspector use AQL 2.5 as a baseline for major defects.
Step 6: Shipping, Delivery, and First Order Lessons
The final step is getting your custom tins safely from the factory floor to your storage facility. Shipping decisions affect cost, timeline, and risk, so it pays to understand your options before you commit. Shipping is where brands often lose money unnecessarily. Choosing the wrong freight method, missing customs paperwork, or using insufficient inner packaging can all result in delays or damaged stock.
Sea Freight vs. Air Freight for Custom Tins
| Shipping Method | Transit Time | Cost (Asia → US) | Best For |
|---|---|---|---|
| Sea freight (FCL) | 25–35 days | $1,500–$3,500 per container | Large orders (5,000+) |
| Sea freight (LCL) | 28–40 days | $300–$800 per CBM | Mid orders (1,000–5,000) |
| Air freight | 5–7 days | $3.50–$7 per kg | Small or urgent orders |
| Express courier | 3–5 days | $5–$12 per kg | Samples and proofs |
Customs, Duties, and HTS Codes for Custom Tins
Custom tins imported into the United States typically fall under HTS Code 7310.29 (tins, cans, and similar containers of iron or steel). Import duties vary between 0% and 5.7% depending on the country of origin and current trade agreements. Work with a licensed customs broker to ensure correct classification and avoid delays.
Inner Packaging That Protects Your Tins in Transit
Always confirm the following with your supplier before shipment:
- Tins are individually wrapped or separated with tissue paper or foam
- Corrugated master cartons are double walled (test score: ≥ 150 ECT)
- Pallets are stretch wrapped and corner-protected
- Each carton has a clear label with SKU, quantity, and product description
If you're placing your first order, browse the SuperTins sample collection to feel the quality of packaging and inner protection firsthand before committing to a large run.
Conclusion
Now you know exactly how to order custom tins from your first design concept all the way through to a pallet of finished product landing at your warehouse door. The process works best when you move in order: define your brief, prepare clean artwork, approve a proof, manage your production timeline, run quality control, and plan your shipping carefully. Each step builds on the last. Skip one, and you'll likely pay for it later. Take them seriously, and you'll end up with tins that genuinely elevate your brand. Ready to get started? Visit SuperTins and request a quote today. Your first custom tin is closer than you think.
Frequently Asked Questions
How long does it take to order custom tins from start to delivery?
The full process from artwork submission to delivery typically takes 8 to 14 weeks for sea freight orders. This includes artwork approval (1 week), pre production sample (2 weeks), mass production (4–5 weeks), quality inspection (1 week), and sea freight transit (3–5 weeks). If you need tins faster, air freight cuts transit to 5–7 days, though it costs significantly more. Always build in a 1–2 week buffer for your launch planning.
What is the minimum order quantity for custom tins?
Most custom tin manufacturers set a minimum order quantity (MOQ) of 500 to 1,000 units for standard shapes and sizes. Fully bespoke shapes with custom tooling usually require a higher MOQ of 3,000–5,000 units to offset the tooling investment. Some suppliers, including SuperTins, offer lower MOQs for in stock tin shapes with custom printing, making it easier for small brands to get started.
What artwork format do I need when ordering custom tins?
You need to submit print ready CMYK files in Adobe Illustrator (.ai) or high resolution PDF format, at a minimum of 300 DPI. All fonts must be outlined or embedded. Artwork must be placed on the supplier's dieline template, with correct bleed (typically 3–5mm) and all critical elements kept within the safe zone. Submitting files in RGB or at low resolution is the most common cause of colour shift and print quality issues.
Are custom tins food safe for packaging edible products?
Custom tins can be food safe, but you must specify this requirement upfront. Food safe tins use an inner lacquer coating (typically epoxy or polyester based) that prevents direct contact between the metal and the food product. Ask your supplier for FDA compliant or EU food contact material certification (Regulation EC 1935/2004 for European markets). Always confirm the coating specification in writing before production begins.